Showing posts with label dessert. Show all posts

Thursday, July 26, 2012

Brownies

Your last Brownie Recipe!

Brownies
Ingredients:
3 eggs
2 cups sugar
1 1/2 tsp vanilla
1/4 tsp salt
1 1/2 cups flour
1/2 cup melted butter
1/2 cup melted shortening (all butter may be used)
3/4 cup powdered baking cocoa
1 cup chopped nuts (optional)


Directions:
Preheat oven to 350*. In a mixing bowl, beat eggs, sugar and vanilla until well mixed. Add butter and shortening. Combine flour, cocoa, and salt; stir into egg mixture and mix well. Add nuts if desired. Grease 9X13 pan; pour batter into pan. Bake in oven for 30 min or until toothpick comes out clean. Cool in pan. Eat and enjoy!

Friday, May 11, 2012

Ableskievers


I first tried these at a wonderful ladies house for brunch. I fell in love with them and invited ourselves over, again for a Sunday brunch so I could talk my husband into letting me get a pan. It worked! We probably have these once a week with applesauce and buttermilk caramel syrup. We are a breakfast family though. My little boy, 9 months now, has a record for eating 7 Aebleskivers! This first recipe is my favorite. We also did chocolate ones for dessert once, not as rich as I thought. We filled them with caramel, peanut butter, and chocolate chips. I am still in search of a great recipe for those. 

Aebleskiver
2 eggs
2 cups buttermilk
2 cups all-purpose flour
1/4 to 1/2 tsp nutmeg
1 tsp. vanilla
2 teaspoons baking powder
1/2 teaspoon fine sea salt
1/2 teaspoon baking soda
2 tablespoons sugar
1/4 cup melted unsalted butter
1 T melted or softened butter (for pan)
Separate the eggs and beat whites until stiff but not dry, and set aside. In another bowl, combine egg yolks, buttermilk, vanilla, flour, baking powder, salt, baking soda, sugar, and butter. Beat until smooth, and then fold in the egg whites. Heat an aebleskiver pan over medium heat and brush each depression with melted butter. Pour about 2 tablespoons of the batter into each cup, and, when bubbly around the edges, turn quickly with a long wooden skewer or toothpick, trying not to puncture the balls. Continue cooking, turning the ball to keep it from burning. You can also add half the batter to the pan, add a teaspoon of jam or fruit, then cover with remaining batter. Great with maple syrup.Enjoy!

!!Best served with applesauce and buttermilk caramel syrup!!


This recipe isn't as sweet, but it would be a great recipe to fill with yummy things!

Ingredients
○ 2 cups all-purpose flour
○ 1 teaspoon kosher salt
○ 1/2 teaspoon baking soda
1/2 teaspoon nutmeg
○ 2 eggs, separated
○ 1 3/4 cups buttermilk
○ 4 tablespoons unsalted butter, melted (more melted butter to brush in the pan)
○ sprinkle of cinnamon to taste (optional)
Directions
a. Put the aebleskiver pan on a medium-to-high heat.
b. Whisk the dry ingredients together. Whisk the egg yolks with the buttermilk and melted butter in a separate bowl.
c. Beat the egg whites until they just hold a 2-inch peak. (don't over beat.)
d. Add the liquid buttermilk-butter-yolk mixture to the dry ingredients in a slow, steady stream while gently mixing with a rubber spatula. You should still have large patches of dry ingredients by the time you finish, this is more wetting of the batter than mixing.
e. Fold in the egg whites, again with a light touch.
f. Brush one of the hollows with some melted butter. Then take a small ladle or big spoon and fill the hollow not-quite-to-the-top with batter. Depending on how hot your pan is, you may need to add batter quickly so the butter doesn't hit its smoke point. Fill the other hollows the same way.
g. By the time you've finished filling the last hollow, the first one should be just about ready for turning. Take your knitting needle (or wooden skewer) poke it into the crust with your poker and pull upward. The idea is to pull the semi-spherical shell up out of the hollow. Push it so it caps off the hollow, allowing the uncooked dough from the center of the shell to fall into the hollow. Repeat for the other hollows.
h. Now it's just about turning the balls every now and then to give them an even heat. Remove from pan when a toothpick comes out clean, usually about 5 or 6 minutes. The aebleskiver should be brown (not just tan).
i. Serve immediately with some thinned raspberry jam.

Chocolate Aebleskivers

Ingredients
2 cups all-purpose or cake flour

1/3 cup cocoa powder
1/3 cup sugar
1 teaspoon salt
1 teaspoon baking soda
3 large eggs
2 cups buttermilk
sweetened whipped cream
powdered sugar
Directions


1. Mix together the flour, cocoa, sugar, salt, and baking soda.
2. Separate the eggs, the yolks from the whites. Set the yolks aside. Beat the egg whites until light and fluffy and soft peaks form.
3. Add the egg yolks and the buttermilk to the flour mixture and stir until combined. Gently fold the egg whites into the batter.
4. Grease your aebleskiver pan with a spray dispenser or with butter (spray your pan again as needed). Heat the pan over medium heat. Fill each cup about two-thirds full with batter. (Try using our Medium Quick Release Scoop to cleanly drop the batter into the cups.)
5. Cook for one to one and one-half minutes before turning. (You can turn your aebleskiver with a toothpick or skewer.) Cook for another minute or until done. Remove to a plate. Fill the pastries with sweetened whipped cream with a tube or star tip on your decorating set or with the nozzle of an aerosol can of whipped cream. Roll the pastries in powdered sugar.


Pumpkin Pie Ebelskivers filled with Vanilla Whipped Cream Cheese
Yield: 20 Ebelskivers
Ingredients:

  • /2 Cup ( 1 1/2 oz./45 g) Graham cracker crumbs
  • 1/4 Cup ( 1 1/2 oz/45 g) All-purpose flour
  • 1/4 Cup ( 2 oz/60 g) firmly packed light brown sugar
  • 1 Tablespoon pumpkin pie spice
  • 1/2 teaspoon baking powder
  • 1/4 teaspoon salt
  • 2 large eggs, separated
  • 1 can (14 oz/440g) sweetened condensed milk
  • 3 Tablespoons unsalted butter, melted  and slightly cooled
  • 1 can ( 15 oz/470g) pumpkin purée
  • Confectioners’ sugar for dusting
  • 1 Cup whipped cream cheese
  • 1 teaspoon vanilla extract


Directions:
Preheat the oven to 200°F (95°C).
In a large bowl, whisk together the graham cracker crumbs, flour, brown sugar, pumpkin pie spice, baking powder, and salt.
In a small bowl, lightly whisk the egg yolks, then whisk in the condensed milk and 2 tablespoons of the melted butter. Add the yolk mixture to the flour mixture and , using a wooden spoon, stir until well blended. The batter will be lumpy.
In a clean bowl, beat the egg whites until stiff, but not dry, peaks form. Fold the egg whites into the batter alternately with the pumpkin purée in 2 additions, just until well blended and no white streaks remain.
In a separate bowl, mix the whipped cream cheese and the vanilla extract together until well blended.
Brush the wells of the ebelskiver pan with some of the melted butter and place over medium heat. When the butter starts to bubble, add 1 tablespoons batter to each well.
Spoon about 1/2 teaspoon of cream cheese mixture into center of each ebelskiver.
Add 1 Tablespoon of the batter to each well, covering the dollop of cream cheese completely.
Cook until the bottoms of the pancakes are lightly browned and crisp, 3-5 minutes. Use 2 short wooden skewers to turn all the pancakes and cook until lightly browned on the other side, about 3 minutes longer.
Transfer the finished pancakes to a platter and keep warm in the oven while you repeat to make 2 more batches. Dust the warm ebelskivers with confectioners’ sugar and serve right away.
Recipe from “Ebelskivers” by Kevin Crafts


Thursday, March 8, 2012

Pull-Apart Cinnamon Sugar Buttermilk Pumpkin Bread with Glaze

This was a pretty delicious gooey treat. My husband and I love pumpkin, no matter what time of year. After making this, I am going to cut the glaze into fourths or not put it on at all, I think it would be perfect without the glaze
Pull-Apart Cinnamon Sugar Buttermilk Pumpkin Bread with Glaze
(Adapted from Sunny Side Up)


Ingredients

Bread
2 Tbsp unsalted butter
1/2 cup buttermilk
2 1/4 teaspoons (1 envelope) active dry yeast
3/4 cup pumpkin puree
1/4 cup white sugar
1 tsp salt
2 1/2 cups bread flour I added 1/2 whole wheat flour

1 cup granulated sugar
2 tsp ground cinnamon
1/2 tsp fresh ground nutmeg
2 Tbsp unsalted butter

Glaze 
2 Tbsp unsalted butter

1/8 cup brown sugar
1 1/2 Tbsp milk
3/4 cup powdered sugar
1 Tbsp Vanilla


Directions

In a saucepan over medium-high heat, brown 2 tablespoons of butter, letting it bubble up and turn a dark golden brown but being careful not to allow it burn (turn black). Once browned, remove the pan from the heat and carefully add the milk, return to stove and heat through.**** Pour the milk and butter into the bowl of standing mixer (fitted with a dough hook) and allow to cool so it is no longer hot but also not cool (about 100-110 degrees F). Once it has reached a warm but not hot temperature add the yeast and 1/4 cup of sugar and allow to proof (this can take up to 8 minutes, the top will look foamy and the liquid cloudy). Then add the the pumpkin, salt, and 1 cup of flour. Stir until combined then add the rest of the flour 1/2 cup at a time and knead for 6 minutes, until the dough is smooth and elastic and just slightly sticky. If the dough is too moist, add extra flour 1 tablespoon at a time. (I let the yeast poof and then added all ingredients into my bread maker and let the bread maker do the work)

Move dough to a lightly oiled bowl and cover with a clean towel. Allow to rise in a warm place for 60-90 minutes or until doubled in size.

While dough is rising, brown another 2 tablespoons of butter. Set aside. Mix the sugar, cinnamon, and nutmeg and mix well.Set aside. Next, grease and flour a 9x5 loaf pan and set aside.

When the dough has doubled in size, punch it down and flip out onto a clean floured surface and knead with hands for 1-2 minutes. Roll dough into a 20x12 inch rectangle.Spread melted butter evenly across rolled dough. Sprinkle the dough with the cinnamon sugar mixture. Cut the rectangle into 6 strips. Lay strips on top of each other and cut each strip into 6 even squares (cut in half then each half into thirds). Stack strips vertically into the loaf pan. Cover the pan with a clean towel and let rise for 30-45 minutes.

In the meantime preheat an oven to 350 degrees. After rising in the pan bake for 30-40 minutes (mine took 37 exactly) or until top is a very deep golden brown.

To prepare the glaze, heat the butter, milk, and brown sugar in a small saucepan. Bring to boil then immediately remove the pan from the heat and stir in the vanilla and powdered sugar.


Tuesday, February 7, 2012

Love Bugs

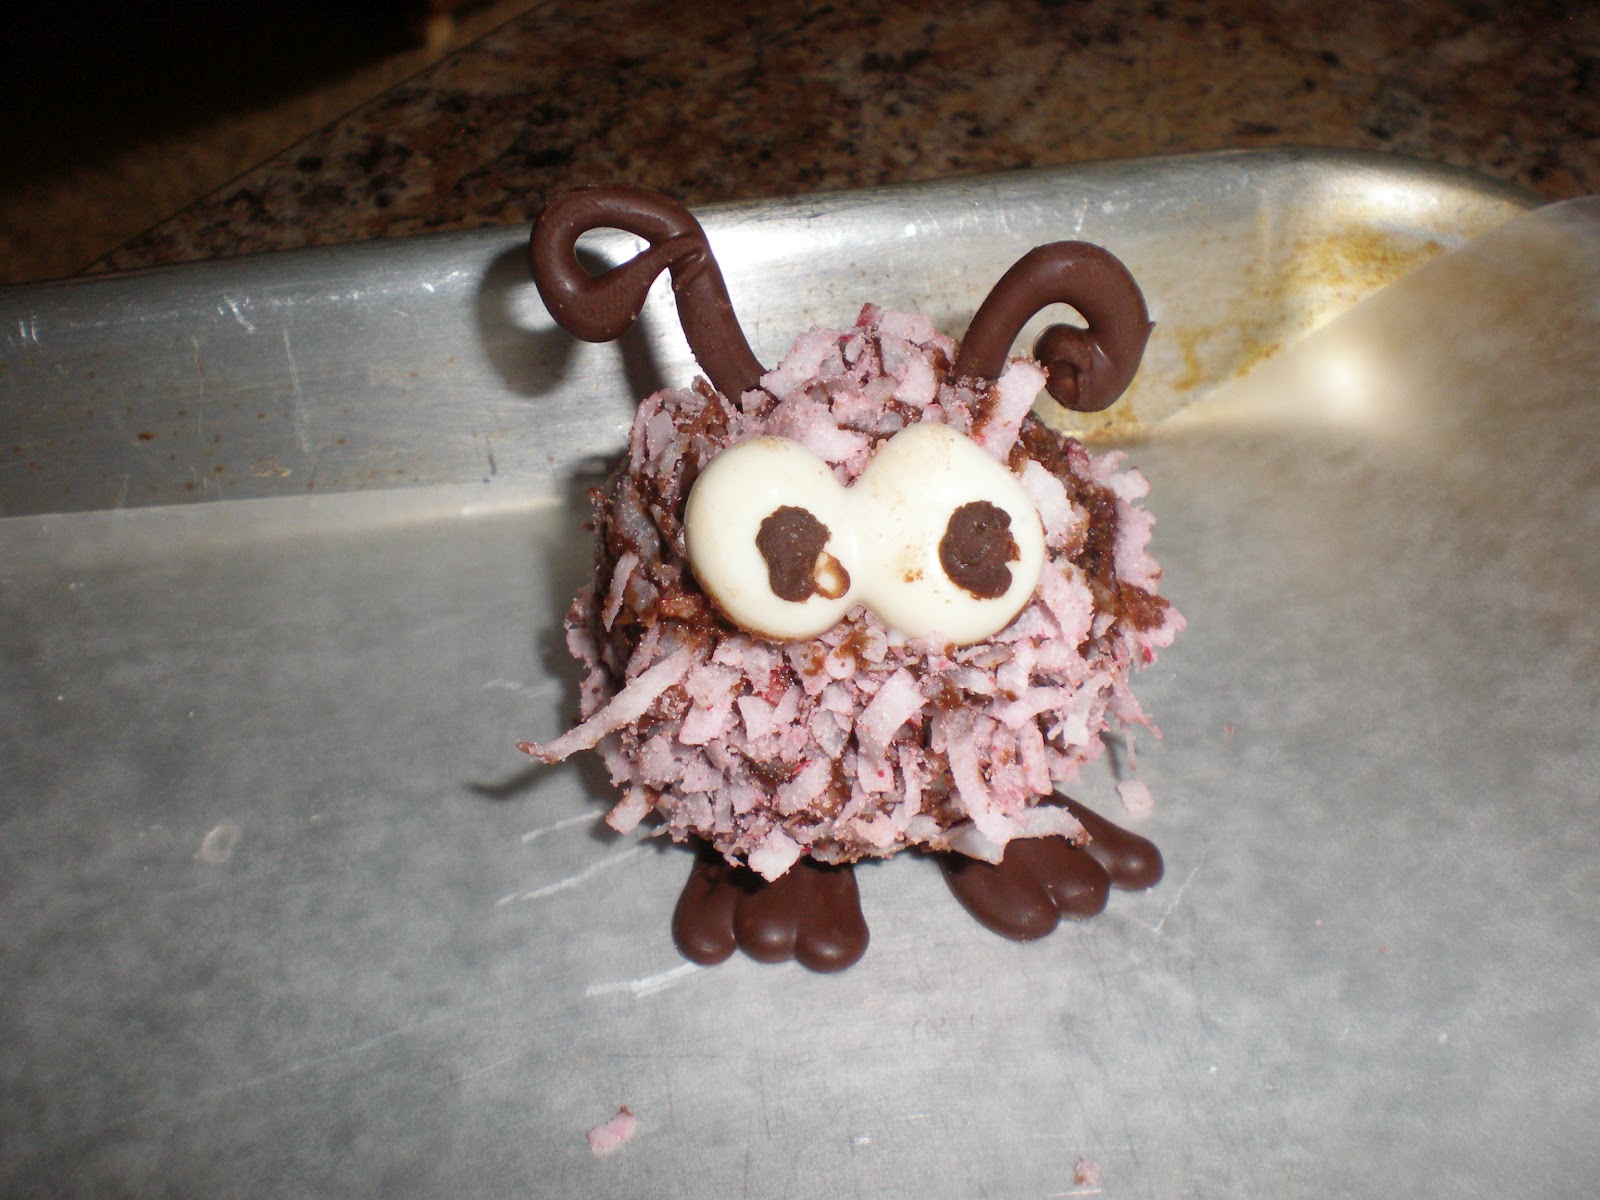
Love Bug Day!

I found this idea on the Hungry Happenings website. Her's are more beautiful then mine and she has much better detailed instructions. I used what I had. I am to cheap to buy the chocolate suggested and used what I had. The almond bark, I had on hand worked great, and it is just store brand white chocolate. It takes a little longer to set up then the molding chocolate, but I had a baby to feed and another child to take care of so, I couldn't have made them any faster anyways. I ended up not using the feet template because I don't have a printer, but I think they still turned out overall very cute. I also made the eyes instead of buying them. When I make these again I will make my eyes together like the Love bug pictured above. Go to her website for better instructions. One thing I did fined out that worked well, is that I had the feet ready on the wax paper to set the ball onto after I dipped it in chocolate. they stuck well, without having to do any extra work to get them on there! These were a lot of fun, and the even better thing is that they tasted great. My little girl had lots of fun making the cake balls with me, and eating lots of chocolate when I wasn't looking.

I found the yarn love bugs at this website, which we made with a bunch of kids for a moms group with the chocolate love bugs as treats. It worked out well!


Homemade Twinkies

These are pretty delicious. Definitely not healthy in any sort of way. The first time I had these was while dating my husband. I like them best after they have sat out of the freezer for a min or two. These are great because you can make any variety you want, they freeze really well, and it is a pretty simple recipe. I always have to recruit my husbands help, when I am trying to put them together other then that, baking time is what takes the longest.


Homemade Twinkies
2 pkg cake mix (any kind) I used Devils food for this batch!
Mix as directed and bake in two 21X15 pan. Try to get the layers even, because these will be the top and bottom to your  Twinkies. Bake at 350* for 20 min. Invert onto cooling rack or pastry towel and let cool completely.

Note: For this cake I decided to try and use pumpkin in it. How that works is that you use 1 3/4 cup pumpkin puree for every box of cake. For this recipe that was a 30oz can of pumpkin puree. It made the batter a lot thicker and a little harder to work with. You could slightly taste the pumpkin in the Twinkies, I thought it was delicious, though, I love pumpkin. It kept the cake super moist, a little too moist, it made it hard to put the top layer on, but once I tasted it, it was worth it. I would do it this way next time. It saves on the cost of eggs, and oil, and also calories, not that it matters when you are eating Twinkies!

Filling:
10 Tbl flour
2 c milk
2 c granulated sugar
1 Tbl vanilla
1/2 tsp salt
1 c shortening
1 c margarine or butter

Combine flour and milk in med saucepan. Cook of Med heat stirring constantly until thick. Remove from heat.  Cool completely. It takes a couple of hours to cool if you just let it sit there after you remove from heat. Combine last five ingredients and beat until fluffy. Add cooled flour mixture and beat until fluffy again.

Put filling on bottom of 1 of cake, spread out try to do it evenly. Then carefully place the other cake bottom side down, onto filling. Refrigerate if possible for about an hour, if not cut up and refrigerate or freeze. Better if they freeze or refrigerate three hours before serving. I cut the cake into 4ths, and then freeze and then cut when ready to serve into 1 inch strips.


Tuesday, January 31, 2012

Pear Sauce and Pear Pie Filling


My husband is amazing! He went and got me some pears from Harry and David. 10C a lb. I am glad he likes me doing projects like this, even though we might be having pizza for dinner. These pears were delicious. I am not the biggest pear lover but I am getting there. I think because I live around a ton of pear orchards that I should really learn to love them.

My awesome husband got me a pressure cooker and canner for Christmas. I decided to experiment and use this in cooking my pears. It was my first time using it, so I was a little scared at first and read the book lots, but everything turned out great. I have the simple, basic tools when it comes to canning so I got to peel and core all the pears myself. Then I cut them up and put them into the pressure cooker. The blog I read and got this recipe off of told me to cover my pears in pear or apple juice. If I were to do this again I wouldn't do that. I ended up with way to much liquid to sauce my pears and spent a lot of unnecessary time draining them off.


I then stuck the pears into my food processor a few cups at at time and then filled my pint jars. I processed according to processing instructions. It turned our pretty delicious!

I also made pear pie filling. I prepped the pears the same way as if I were going to sauce them. Then I stuck them in a bowl with sugar, according to taste, I am sorry I didn't measure this. My awesome mother in law also gave me some stuff that goes well when canning pie filling. It is called ultra set and you can purchase it at Kitchen Kneads, which I think is in Utah. The nice thing about it is that you don't have to cook your sauce before canning. I mixed my sauce with the pears and poured them into my jars and processed according to processing instructions. I didn't have enough quart jars at the time, so I stuck some in Ziploc bags and froze them. It freezes well also.


Wednesday, January 18, 2012

Banana Split Cake


Banana Split Cake
Serves: 18, 9 X 13 pan
Recipe from: Mom

Ingredients: 
Crust 
1 pkg vanilla wafers (12 oz)
1/2 c butter or margarine

4 c powdered sugar
1 c butter or margarine
1 tsp vanilla
1 can (20 oz) crushed pineapple
3 to 4 bananas, sliced
2 c whipped topping (cool whip)

If desired
maraschino cherries
chopped nuts
chocolate or caramel syrup

Make crust with crushed wafers and butter. Refigerate.

Combine powdered sugar and 1 cup butter with vanilla and beat untl smooth. Spread over crust. Spread drained crushed pineapple over filling. Next place banana slices. cover with whipped topping and layer with desired toppings.

Creamy Caramels


Creamy Caramels
Makes approximately 2lb

Ingredients
2 c sugar
2 c corn syrup
1/2 c butter or margarine
2 c evaporated milk or cream
1 tsp vanilla
dash of salt

Place sugar, salt and corn syrup into 3-4 qt saucepan. On Med to med high heat. heat to boil and boil to firm ball stage (245*), stirring occasionally. Gradually add butter and milk. Do not let mixture stop boiling. Continue to cook rapidly with constant stirring  to med ball stage (242*). Remove from heat and stir in vanilla. Pour into butterd 9 by 13 metal pan. Let cool, then remove from pan, cut, and wrap in wax paper. 

The first part of this goes pretty quick, it doesn't take very long for the intial sugar mixture to get to firm ball stage. It is important to not let the mixture stop boiling. I cute up the butter and had the cream sitting on the counter. My mom even goes as far as melting the butter before hand.  I add a little at a time, the whole adding process took me about 5 to 10 min, just a little at at time to make sure it doesn't stop boiling. It came close a few times, but it picked up its rapid boil again quickly. it sounds harder then it really is. Once you add the cream it is important to stir in constantly because the cream is easily burnable. but as long as you stir it constantly and no higher then med high heat it will be fine. Once you add the cream it takes a lot longer to get to med ball stage. i use a candy thermometer. If I remember right it seemed like it was almost 20 min on Friday just stirring constantly. My mixture was at 125* for most of the time, but once it started heating up it was about 5 min more until it got to 245* and I let it cook there for about a min just to insure that it was really at that stage and wouldn't be too soft. i also put some in a cup with ice water to check the stage. i also like it as a little treat because it is delicious. Once it gets to that point, I quickly add the vanilla and then pour into the pan. You should pre butter your pan and get everything ready so that once you add the cream you don't have to go searching for anything else, until the caramel is poured into the pan. 

I love making these and I hope you enjoy

Tuesday, January 17, 2012

Best Fruit Pizza Crust

I have made lots of different crusts, but this one is my favorite. This one is a keeper.

Best Fruit Pizza Crust
1 1/4 cup flour
1/2 tsp baking powder
1/4 tsp salt ( I only add a dash, I try not to use too much salt in my cooking)
8 tbl margarine
1/2 granulated sugar
1/4 c brown sugar
1 large egg
1 tsp vanilla extract


For the crust: Preheat the oven to 350 degrees F. Spray a 10 to 12-inch tart pan or pizza pan with nonstick cooking spray.
In a medium bowl, whisk together the flour, baking powder and salt. In a large mixing bowl, cream together the butter and sugars using a handheld mixer until smooth. Add in the egg and vanilla and mix until incorporated. Slowly incorporate the flour mixture into the creamed butter and mix until blended. Remove the dough from the bowl and press into the prepared pan. (You may need to dust your hands with some flour to prevent the dough from sticking to them. It is wet dough when it comes together.)
Bake until the edges just start to brown, 10 to 12 minutes. Remove from the oven and let cool

Cover with your favorite Fruit Pizza toppings.
Mine coming soon!

Chocolate chip cookie Bars

I found these the other day they were delightful. My husband really only wants chocolate chip cookies and sometimes they take so much work and time to make them into cookies. That is what makes these bars so amazing. You can treat them like cookies and add a variety of chips, nuts, or any other thing you want and then put them in the pan, spread them out, they are delicious. I have never made cookies with pudding in them, a little worried about how these might turn out but they were delightful. After making these I am going to have to try these cookies next that I found at this site!http://www.twopeasandtheirpod.com/vanilla-pudding-chocolate-chip-cookies/


I hope you enjoy, I know I did. I am definitely making these again.


Bugs Bunny Bars
1 cup butter or margarine
3/4 cup firmly packed light brown sugar
1/4 cup granulated sugar
1 pkg. (4-serving size) vanilla instant pudding
1 tsp vanilla
2 eggs
2 1/4 cups flour
1 tsp baking soda
1 pkg. (12 oz.) semi-sweet mini chocolate chips (2 cups)
Heat oven to 375. Beat butter, sugars, pudding mix and vanilla in a large bowl on medium speed until smooth. Beat in eggs. Gradually add flour and baking soda, beating until well blended. Stir in chips. (Batter will be stiff.) Spread in greased 13 X 9 baking pan. Bake 20 to 25 minutes or until golden brown. Cool in pan on wire rack cut into bars.